Saturday, November 20, 2010

Bountiful Basket - November 20, 2010


This week is sort of an example of the ups and downs of having someone else in control of what you get in your basket.  I still think it's fun to get the surprise each week, and for the money, it's an economical bit of fun.  But, of course I'd make different choices on some things, if it were me in charge of it.  Probably a good thing I'm not!  

The only vegetable I can think of that I really don't like is green bell peppers.  I got 3 today.  They usually just wind up in the trash, but I'm really going to try to use at least one or two.  I'm thinking I could just chop it very fine and throw it into a soup or casserole.  Some dish where I won't really have to taste them.  Green peppers, blech.

And 11 radishes??!!  I can't even remember the last time I had a radish.  I don't have anything against them -- it's just not a vegetable I usually buy.  Hopefully, I can get some ideas online for how to use at least some of them (besides the ubiquitous salad fixin').  11 of them, though.  That's a lot of raddi.

I was glad to see onions and celery.  I'm thinking about trying to make real cornbread dressing like Mama used to make (SO good!), and I'll need onions and celery for that.

And what is with all the pears?  We've gotten pears every week for probably the last 6 weeks, and they're everywhere.  We like pears just fine, but I must have two dozen or more sitting on the counter.  Same with apples -- but even more so!  I realize apples and pears are much cheaper this time of year, but every single week?  If I could get motivated, I could process a batch of apple sauce.  I'll work on that whole motivation thing.  Tomorrow.


So, here we go . . . this week's Bountiful Basket:


11 radishes
8 red potatoes
3 yellow onions
3 tomatoes
3 green bell beppers (yuck!)
1 head of leaf lettuce
1 bunch of celery
9 bananas
8 navel oranges
8 tangeriens
7 Braeburn apples
7 Concorde pears
1 honeydew melon

Add-on:  Ciabatta bread - 5 loaves ($10)

Thursday, November 18, 2010

Banana and Nutella Spring Rolls

The Why:

I was already using egg roll wrappers for my ravioli (see previous post), so I thought I'd try making a dessert spring roll using the thin spring roll wrappers I also had on hand. I had bananas from my Bountiful Basket and a jar of Nutella in the pantry, and that sounded like a delish combo. And it turned out even better than I thought it would! The wrapper was crisp and flaky, and was the perfect contrast to the almost creaminess of the banana and richness of the Nutella. This is definitely a keeper. And it was so fast and easy, if you have everything on hand, you can literally have them done, start to finish, in 5 minutes.

The How:


Banana and Nutella Spring Roll

For each roll:

1/2 of a banana, cut in half (so 2 quarters of a whole banana)
2 t. of Nutella
1/8 t. of Chinese Five Spice (optional, or you could use a dash each of cinnamon and nutmeg)
1 spring roll or egg roll wrapper

Smear the Nutella on the cut side of one banana quarter and put the other quarter on top so the cut sides are facing. Sprinkle with Chinese Five Spice, if using. Place the banana in the center of the wrapper, and wrap as you would an egg roll or a burrito. Brush the edge of the wrapper with a little water and press to seal. Fry in a deep fryer at 350 to 375 degrees for about 1 to 2 minutes, until the wrapper turns golden brown. (You can also fry in a skillet with oil -- just flip halfway through and cook until the wrapper is golden brown and crispy).

Sprinkle with powdered sugar, if desired, and serve with ice cream.

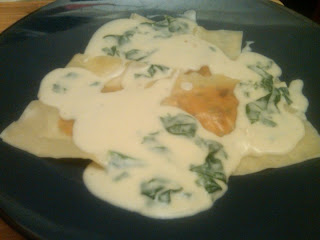
Sweet Potato and Caramelized Onion Ravioli with Roasted Garlic - Asiago Cheese Sauce

The Why:

I've been trying to use more of the produce from my Bountiful Basket, as I just hate for fresh stuff to go bad. But there are only 2 of us, and only 1 of us is a true vegetable fan. So you can see the problem.

One benefit of winter produce, though, is that much of it -- root vegetables, especially -- keeps much longer than leafy greens. That gives me a little time to figure out what I want to do with some of it, when I'm feeling creative.

Over the last few weeks, I've had potatoes (both sweet and russet) in my basket. Just in the last month, I've gotten 3 five pound bags of russets and a couple dozen sweet potatoes. That's a lot of taters for two people!

The russets aren't really a problem to use up. Just in the last week, I've used them in roasted cauliflower soup and roasted corn chowder, and I'm planning to make a batch of potato soup sometime in the next few days. But, I'm the only one who will eat the sweet potatoes, and that's a lot them!

Yesterday, I decided I wanted to use some of the sweet potatoes and I was trying to think of something outside the standard baked potato to make. I've tried butternut squash ravioli and pumpkin ravioli and liked it okay, but that's not something I'd really order in a restaurant. And I've never made ravioli myself, except the kind you just put in boiling water, so I did a little research (thank you again, Google!).

I should say that I don't make dough as a general rule -- for bread or pasta. I'd probably actually enjoy it if I could just get over the mindset that it's too messy and too involved. I'll work on that.

So, I was both surprised and intrigued when I saw several recipes for ravioli using -- wonton wrappers! I can't recall ever hearing that done before, but it seems to be pretty popular with homemaking-ravioli folks. And the results both sounded and looked fantastic from what I saw online.

It just so happens that I have a couple of packages of egg roll skins and spring roll wrappers in the freezer, so I thought I should give that a try. (Egg roll skins are really just a bigger version of wonton wrappers -- I just cut my egg roll skins into 4 squares per sheet, which is just the right size).

I did a quick inventory of my fridge and pantry to see what I had to use for the sweet potato filling. Sweet potatoes, obviously! I also had onions, fresh garlic, asiago cheese, fresh parsley, and my well-stocked spice cabinet. I thought I could make a fabulous filling with those things. Then I moved on to sauce. Sage butter sounded great, but I didn't have fresh sage and didn't want to go to the grosto. I decided I'd go with an asiago cheese sauce -- I had milk and some cream left from the chowder. I also had some fresh spinach on hand, so it wasn't difficult to come up with the roasted garlic - asiago cheese sauce with spinach.

I was a tiny bit intimidated at the prospect of making ravioli -- it just seemed ambitious considering I'd never done it before. But, seriously, with the egg roll wrappers, it couldn't have been easier. Most people would think that making the sauce would be more nerve-wracking, but I always seem to make a perfect roux (knock on wood), and the rest is gravy. (Hee hee hee).

Some things I will note:

Wonton wrappers are usually round and egg roll wrappers are square. The shape really doesn't matter. You can make them round, square, triangle, tortellini-shaped -- it's not going to affect the taste. So pick the one you like and go with it.

Don't over stuff the ravioli! It can be tempting, because we really do want to fill that empty space in there. Don't. Do. It. If your ravioli is too full, when you go to seal it, the filling will squish out and the ravioli will break apart when you try to boil them. You don't want that mess! I put about 1.5 to 2 teaspoons of filling in each raviolo, and that worked out very well.

Make sure you seal the edges firmly. I used an egg wash using the egg white left from the filling and a little water. You can use just plain water or a mix of water and cornstarch. Just brush whatever you use as your sealant around the edges with your finger and a little in toward the center (I probably went in a half inch or so), then press the edges very firmly -- trying to get as much air out as you can without squishing the filling out the ends.

Finally, I recommend using a mild boil for cooking them. For every other pasta, a rolling boil is fine, but will filled pasta, that much boil could cause the edges to separate, especially if they're not sealed tightly. And you don't want to deal with exploding ravioli.

Now, on to the good stuff!

The How:


Sweet Potato and Caramelized Onion Ravioli with Spinach in Roasted Garlic - Asiago Cream Sauce


Ravioli:


4 medium sweet potatoes

1 C. onions, diced small

¼ C. grated asiago or parmesan cheese

1 egg yolk, beaten

2 T. parsley, minced

1/8 t. nutmeg

Salt and pepper, to taste

Wonton or egg roll wrappers (I used egg roll skins and cut each one into square quarters).


Roasted Garlic - Asiago Cheese Sauce:


3 tablespoons butter

3 tablespoons all-purpose flour

3 C. milk

½ C. heavy cream

1 cup grated asiago cheese (or parmesan or pecorino romano)

6 cloves of roasted garlic, pureed or mashed thoroughly

1/2 teaspoon nutmeg

1/2 teaspoon fresh ground pepper

2 C. fresh spinach, torn into pieces


Cut sweet potatoes in half and drizzle each with EVOO. Place cut side down on a foil lined baking sheet. Bake at 375 degrees for 35 to 40 minutes, until potatoes are very tender. (You can also roast the garlic with the potatoes. Cut the top off of a head of garlic, drizzle with oil, wrap in foil, and place on the baking sheet with the potatoes). When potatoes are done, remove from oven and allow to cool for 10 to 15 minutes.


While the potatoes are cooling, heat 1 T. butter or EVOO in a skillet. Sauté onions over medium heat until they are nicely golden, about 8 to 10 minutes.


Peel the skin from the potatoes (the skin should come off easily) and place in a bowl, along with 4 cloves of the roasted garlic. Mash thoroughly or puree in a blender if you want the filling completely smooth. Add the caramelized onions, 1 cup of grated asiago cheese, the beaten egg yolk, parsley, nutmeg, and a little salt and fresh ground pepper. Mix well.


Beat the egg white left from the filling with about 1 tablespoon of water for an egg wash. Place about 1 to 2 teaspoons of the filling in the center of each wonton / eggroll wrapper. Using your finger or a pastry brush, brush the edges of the bottom wrapper with the egg wash and cover with another wrapper, getting as much air out as possible. Press the edges firmly to seal.


Bring a pot of water to a boil, then reduce heat to medium and let the water get back to a good simmer (not a rolling boil – this could cause the ravioli to break open). Working in batches, put the ravioli in the water, gently separating them as needed to prevent sticking. Don't crowd them in the pot. Cook approximately 3 to 4 minutes (about 1 minute or so after they float to the top). Remove with a slotted spoon and drain.


Sauce:


Melt butter in a saucepan over medium heat. Stir in flour and cook, whisking constantly, until the color is light golden brown. Add milk and cream, a little at a time, whisking after each addition. Cook and stir until thickened, about 4 minutes. Do not boil.


Stir in cheese, nutmeg, and pepper, and whisk until smooth. Add the spinach and cook until wilted. Spoon or ladle the sauce over the ravioli.

Tuesday, November 16, 2010

Roasted Corn and Shrimp Chowder


The Why:

Personally, I think it's a mean trick by Mother Nature. One of my favorite ways to enjoy fresh corn is in a hearty, comforting, steaming bowl of roasted corn chowder when the temperatures turn cooler in fall and winter. Of course, the prime time for the best tasting fresh corn is when? That's right -- summer! What was Mother Nature thinking?

As it's mid-November, I was rather surprised to see a half a dozen ears of fresh corn in my Bountiful Basket this last Saturday. But, hey, I'm a huge fan of corn, so I'll take it! The ears weren't as plump and gorgeous as we had in the summer, and one was trashed immediately because it had mold on the top. (I know it's a delicacy in some parts of Mexico, but I just don't do moldy corn). Frankly, the taste of the corn in the final product wasn't as sweet and delicious as I remember from the summer corn, but I'll almost always take fresh vegetables over frozen, so considering the time of year, I was very pleased with the outcome. In fact, this has been my favorite so far in what I consider "soup season."

If you look over the ingredients, yes, you'll see bacon, butter, and cream. But this recipe makes a huge batch -- I'd estimate 8 to 10 meal-size servings or 12 to 16 appetizer servings. So if you cost out the fat and calories over the number of serving sizes, it's actually not that bad. In the whole batch, I used 3 slices of bacon, 2 tablespoons of butter, and one cup of cream. The rest of the liquid is in the form of chicken stock and low-fat milk. For a chowder-type soup, that's not totally awful.

I should note that I prefer my corn chowder to be more on the "soupy" side -- meaning it's not a thick chowder that you often see with something like clam chowder. If you prefer more thickness, you could reduce the amount of stock or use a thickening agent, such as a slurry of cornstarch and stock. I haven't tried this one in chowder, but I'd think you could puree some of the potatoes and add that back in to thicken the base. If anyone tries this, let me know how it worked out for you.

Also, I make my chowder from scratch. There are so many recipes online that call for cream of whatever soup (usually potato) and canned cream corn. I just don't do it that way -- when I want something as rich and comforting as corn chowder, I want the real deal! It's more time and effort, but I love the payoff.

A few "tricks":

I always roast the corn first. You just can't beat that roasted corn flavor, and that carries over fabulously in the soup. Hence the name, Roasted Corn Chowder. However, I do realize that tis the season where fresh corn is scarce. So, if you can't find fresh, feel free to use frozen corn kernels and, obviously, omit the step using the corn cobs.

Pureeing some of the corn with a little chicken stock gives an additional texture (like creamed corn) to the soup. Creaming the corn also helps thicken the base.

Also, as you'll see in the instructions, I use the corn cobs to enhance the flavor -- there's still a lot of corniness in those cobs, so it seems a shame to let that go to waste. Think of it as making "corn stock" during the soup-making process.

Finally, as you'll come to see if you check out my recipes regularly, I'm a huge fan of a little heat in my eats. Usually, you can leave out the heat producer if you prefer without hurting the flavor, but I just really love my spice -- especially when it's chilly out. In this recipe, I used one large chipotle in adobo pepper -- you can find these in cans in the Mexican aisle of the grocery store. Just the one pepper gave the soup a really nice level of spice without overpowering the corn taste. But if you prefer your chowder straight up, feel free to omit the pepper.

Now on to the good stuff!

The How:


Roasted Corn and Shrimp Chowder with Chipotle


3 slices of bacon, diced
2 T. butter
1 C. onion, diced (about 1 medium onion)
3 cloves garlic, finely chopped
2 celery ribs, chopped
3 C. low-fat milk (2 percent)
1 C. heavy cream
3 to 4 C. chicken broth
1 bay leaf
3 C. potatoes, peeled and diced into ½ inch cubes
4 C. roasted corn, cut from the cob (about 6 medium ears)
1 chipotle in adobo, plus some of the sauce (optional)
½ C. red bell pepper, small diced
½ to ¾ lb large raw shrimp, peeled and deveined
Chives for garnish (optional)


Preparing the corn:

To roast corn on the grill: Soak the ears – husks and all – in a sink full of water for one hour. Either make sure the ears are completely submersed or turn them occasionally. After soaking, trim or pull off any silk and pieces of husk that are hanging out which could catch on fire. Grill on medium to medium-high heat for about 12 to 15 minutes, turning a quarter of a turn every 2 or 3 minutes, until husks are nicely blackened.

To roast in the oven: Place corn, in husks, directly on the oven rack and roast at 350 degrees for 30 to 35 minutes.

Let cool enough to handle, then cut the kernels off the cob. Cut the cobs in half and save them for the soup base.

The soup base:

In a large saucepan, melt the butter over medium heat. Add the bacon and fry until crisp, but not burned. Add the onion and garlic and sauté for 4 to 5 minutes, until the onions are soft. Add the celery and cook for 4 to 5 more minutes. Remove from heat.

Add the corn cobs to the saucepan. Add the milk, cream, 3 cups of the stock, and the bay leaf. With the heat on medium, bring the liquid up to a simmer and reduce the heat to medium-low to low. Simmer for 30 minutes, keeping the heat just high enough for a gentle simmer, but don’t boil. Stir frequently to ensure the milk doesn’t scald.

Everything else:

In a blender or food processor, puree 1 cup of the corn kernels with the remaining 1 cup of the stock and the chipotle pepper, if using.
Discard the cobs and the bay leaf from the saucepan and raise the heat to medium. Add the potatoes, corn kernels, corn puree, red bell pepper, salt and fresh ground pepper to taste. Simmer until the potatoes are tender, stirring occasionally, about 15 minutes.

Add the shrimp and the thyme. Simmer for about 4 to 5 minutes, until the shrimp turn pink.

Monday, November 15, 2010

Shrimp Scampi-anesca with Pasta

The Why:

I've long had a love-hate relationship with shrimp scampi. I love the flavors, but when I've ordered it in restaurants, it's so rich that I can never eat a whole portion (especially with American portion sizes as super-sized as they are) -- and scampi sauce just tends to not reheat that well. I've made it at home a handful of times but, to be honest, I really don't like knowing just how much butter is in that sauce!

As an aside, I had a blood panel done a couple of months ago and my LDL (the icky stuff) was in the optimal range (just over 100). My HDL (the good stuff) was quite impressive to my doctor at a whopping 85. Apparently, the higher the HDL is, the more protected you are against heart disease. So, with that said, I think I must be doing something right!

I cook almost exclusively with EVOO, but I do occasionally use real butter. My thought is, if I'm going to splurge, then I'm going to use the most natural product available to me -- and I'd much prefer to use the real thing rather than a tub of something with ingredients I can't pronounce.

So, with that in mind, I made my own recipe for a scampi-type dish that I think is fabulous. I call it "scampi-type" because my sauce, while rich in flavor, doesn't have that scampi-effect of coating my tongue and the inside of my mouth with fat. (Not a fan of that feeling!) It's still a splurge because I use a good amount of butter, although probably significantly less than what restaurants use.

Another little trick I use in it is anchovy paste. Now, don't freak! You can't even tell it's anchovy in the final product, but I find it adds a little sump'in-sump'in to the richness of the sauce. This is where the -anesca in the name of the dish comes from -- anchovies are a must ingredient in puttanesca sauce.

Before I get to the actual recipe -- and I'll get there, I promise -- I want to note a couple of things.

First, I estimated my measurement of garlic in the recipe based on what I'd think normal garlic-eating consumers of the world would use. In my house, though, we are absolute garlic freaks. I made this last night and used 12 garlic cloves -- and I'd have been happy to have used even more. Keep in mind that all of my recipes should be customized to your own taste buds -- I don't have to eat what you cook, but you do! So feel free to make any of these recipes your own by increasing or decreasing any of the amounts.

Second, my preference in this dish is to have all of the noodles well-coated with sauce, but not absolutely dripping with it, like usually happens in restaurants. Again, do this to your liking. There's a note at the end of the recipe with more recommendations.

Third, I use anchovy paste in this recipe simply because I generally keep a tube of it in the pantry. But if you'd prefer to use anchovy fillets, the general rule is 1/2 teaspoon of the paste is the equivalent of 2 fillets. The fillets tend to have a stronger taste, though, so if you're worried about it, use a little less -- you can always add more, but you can't take it out once it's in there. If you haven't cooked with the fillets, they will melt into the sauce completely -- so don't be worried that you'll have bits of anchovy fillet floating around to scare the spouse and kids.


The How:

Shrimp Scampi-anesca and Pasta


1 lb large raw shrimp, peeled and deveined

* 8 to 12 oz of pasta – linguine, spaghetti, angel hair

4 to 6 T. EVOO

6 to 8 T. unsalted butter (3/4 to 1 stick), more if you want it more buttery tasting

½ C. white wine (I used pinot grigio, but you could use sauvignon blanc or chardonnay)

Juice of one lemon (about 2 T.)

2 t. anchovy paste

6 cloves of garlic (or more!), thinly sliced on a mandolin or chopped medium fine

2 shallots, diced

½ to 1 t. red pepper flakes (optional)

¼ C. fresh parsley

Salt

Pepper

Chives

Fresh grated parmesan


Prepare the pasta according to package directions.


In a large skillet, melt 2 tablespoons of the butter with 2 tablespoons of the olive oil over medium heat. Sauté the shallots and garlic until the shallots are translucent, about 3 to 4 minutes.


Season the shrimp with salt and pepper; add to the pan and cook just until they turn pink, about 2 to 3 minutes. Remove the shrimp from the pan with a slotted spoon; set aside and keep warm.


Add the wine, lemon juice, and red pepper flakes (if using) to the skillet and bring to a boil. Add the anchovy paste and stir until the paste melts and incorporates into the sauce. Add 4 more tablespoons of the butter and 2 more tablespoons of olive oil. Cook for another minute or two and taste. At this point you can add more butter and/or olive oil to get the sauce to your preferred taste and consistency.


Return the shrimp to the pan and add the parsley. Add the cooked pasta and stir until the noodles are coated with sauce. Season with salt and pepper.


Garnish with chopped chives and fresh grated parmesan, if desired.


*Note: I used on the high end of the measurements for the sauce because I used linguini (about 8 ounces). If you use a very fine pasta, such as angel hair, you’ll probably need to add more of the pasta so that the sauce doesn’t overwhelm the noodles. I’d recommend starting with 8 ounces of pasta mixed into the sauce, then add a little more at a time until the noodles are coated without swimming in sauce. Unless, of course, you prefer it to swim!

Saturday, November 13, 2010

Individual Chicken Pot Pies

The Why:

When I was in law school, about 1,000 years ago, my BFF and I used to hang out a lot -- um, I mean STUDY a lot -- at a local coffee house. Back then it was called The Double Rainbow, but the name has since changed to The Flying Star. I still call it Double Rainbow, of course.

Anyway . . .

The menu at DR featured daily specials, including soups, salads, and various entrees. The food was fabulous, and the desserts were just to die for. Pastries and breads are made fresh by their bakery every day and are just melt-in-your-mouth good.

One of their occasional offerings was an individual chicken pot pie. It happened to be a special one warm and sunny fall day, and Kelly and I were in line to order. I told her I was getting the pot pie. She said, "You can't order that today." I asked her why not. "It's just not a chicken pot pie day." I understood exactly what she meant. I ordered the quiche instead.

Although I'd never really described it that way before, the whole "chicken pot pie day" is totally spot-on. First, it has to be a chilly day -- preferably downright cold. Second, while it really shouldn't be sunny, you can get away with it if it's really cold out. Cloudy is definitely preferable, but the ideal "chicken pot pie day" is bitingly cold and rainy or snowy. Just try and tell me you don't know what I mean!

There's something just so warming and comforting about the chicken pot pie. It's completely blanketed in warm, flaky, luscious crust. When you crack open that crust, steam comes pouring out, warming your nose a little as you bend in to smell the deliciousness that is a good pot pie. The first bite should be a little bit of heavenly warmth -- tender, but not mushy, vegetables covered with hot, velvety sauce sporting a little tang, and bites of perfectly cooked chicken, moist and flavorful. It's the kind of thing that warms you from the inside out and just makes you feel loved. And who doesn't need that sometimes?

The How:

Chicken and Vegetables in a Dijon-Herb Cream Sauce, Under a Puff Pastry Crust


The Filling


2 C. cooked chicken, cubed or shredded

1 C. of onion, diced

2 to 3 garlic cloves, finely chopped

2.5 C. potatoes, diced into about ½ inch cubes

½ C. of celery, chopped

¾ C. of carrots, sliced

½ C. of frozen green peas, thawed (or ½ cup of green beans)

½ t. thyme, chopped

½ t. rosemary, finely chopped

Salt and Pepper


Pre-made puff pastry crust, thawed at room temperature for about 30 to 40 minutes

1 egg, beaten, plus 1 T of water (egg wash)

Grated Parmesan cheese (optional)


Dijon Herb Cream Sauce

4 T. butter

4 T. flour

2 C. milk

½ C. Mexican crema or heavy cream

½ to 1 C. chicken stock

¼ t. of fresh grated nutmeg

½ t. fresh or dried tarragon

½ t. fresh thyme, chopped

½ t. fresh rosemary, finely chopped

½ t. dried sage, ground (or rubbed)

½ t. dried marjoram

4 to 5 T. Dijon mustard

1 to 2 t. capers

Salt

Pepper


Vegetable filling: In a large skillet, sauté onion and garlic in EVOO for 1 to 2 minutes. Add potatoes and cook for 5 minutes. Add carrots and celery and cook until the vegetables are tender, about 10 to 15 minutes. Add the peas, thyme, and rosemary, and cook for an additional 1 to 2 minutes, until the peas are heated through.


Sauce: Melt 4 tablespoons of butter in a medium saucepan over medium heat. Add flour a little at a time, whisking constantly until mixture begins to turn golden, about 2 to 3 minutes. Slowly pour in milk, whisking constantly until mixture is smooth (do not boil). Pour in the crema / cream, and continue whisking. Add ½ cup of the chicken stock and whisk until mixture thickens, 4 to 6 minutes. If the sauce is too thick at this point, add more stock a little at a time until the sauce reaches the desired consistency (should be about the consistency of a thick gravy). Stir in nutmeg, salt and pepper. Add the tarragon, thyme, rosemary, sage, and marjoram. Add 2 tablespoons of the Dijon and stir to incorporate. At this point, taste the sauce and add more Dijon ½ tablespoon at a time until you get the level of mustard taste you prefer. Add the capers and stir to distribute.


The Assembly:

Spray 4 oven-proof large single serving ramekins (10 oz) with non-stick spray. Place a layer of the chicken on the bottom of each ramekin, and cover with the vegetable mixture to about ½ inch below the edge of the ramekin. Spoon the sauce into the ramekins until the filling is nicely covered and distributed through the vegetables and chicken.


Cut the puff pastry into squares large enough to cover the top of the ramekin, with about 1 inch of overhang. Brush the edges of one side of the crust with the egg wash, and place that side down over the ramekins, pressing the egg-washed edge to the side of the ramekin. Brush the top of the pastry with the egg wash. Sprinkle parmesan cheese over the crust.


Bake at 400 degrees (or according to package directions) until pastry is golden brown, about 15 to 20 minutes. Let sit for about 5 minutes, then serve.


* I created this recipe based on 4 – 10 oz individual ramekins. Based on ramekin size and number you use, you may need to adjust the quantities up or down.


** If you want a faster and less labor-intensive method (or you have an especially picky mate or kids):

-- Substitute 2 cans of cream-based condensed soup (e.g. cream of chicken and/or cream of mushroom) plus 2 soup cans of milk for the Dijon cream sauce. OR – Use gravy in a jar in an amount to get your preferred sauciness. (Just add the herbs to the vegetable mixture near the end when using either of these subs).


-- Use a deli rotisserie chicken and pick the meat off.

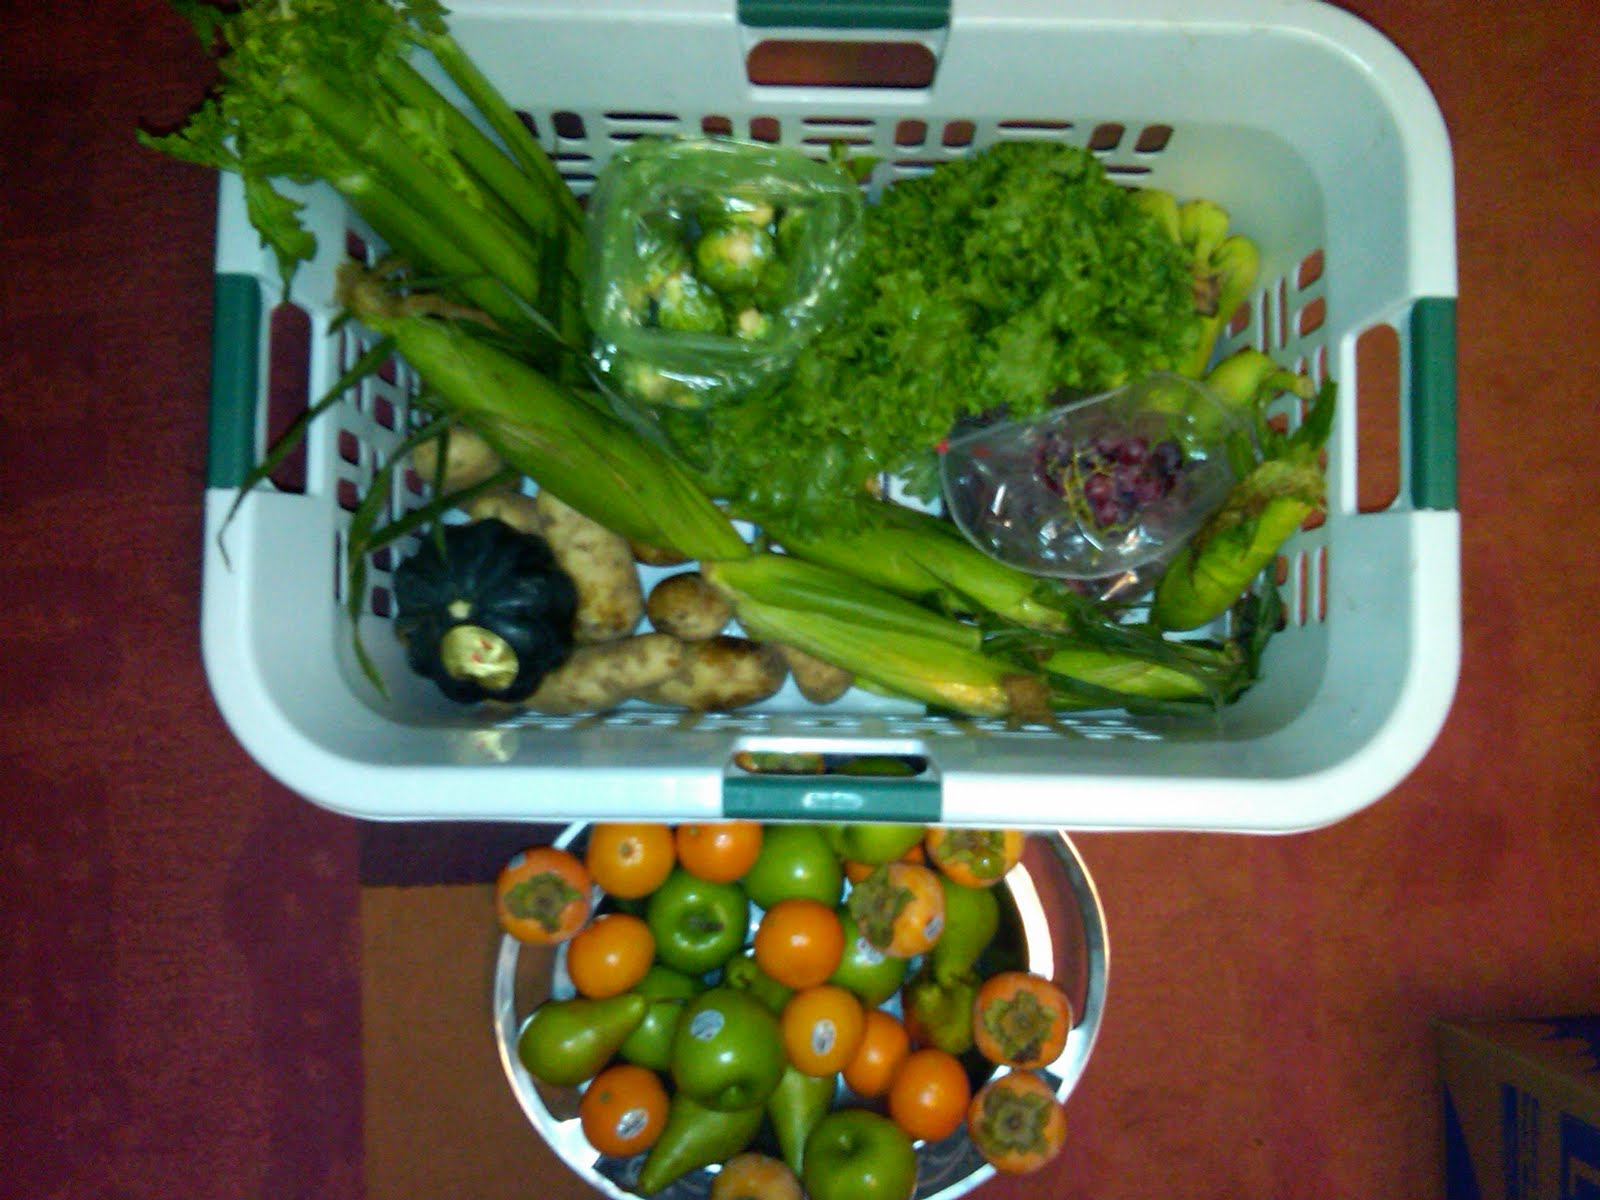
Bountiful Basket - November 13, 2010

My Saturday morning routine for the last few months has been to drag myself out of bed at 7:30 am (way too early for a Saturday, I think), grab my big clothes basket and head over to a park nearby to pick up my basket full of produce. Bountiful Baskets is a co-op run and staffed entirely by volunteers, and it gives the participants the buying power that individuals just don't have. For $16.50 ($15 for the produce plus $1.50 handling fee), we get a variety of fruits and vegetables each week -- at least 6 different varieties of fruit and 6 of veggies. I order each week on Monday or Tuesday and pick up on Saturday morning.

And yes, we really do use actual baskets -- volunteers unload the produce trucks and distribute the goods into 2 round clothes baskets per person, one for vegetables and one for fruits. I take a big, rectangular clothes basket that I've now designated for use solely for that purpose and transfer my stuff from their baskets to mine for the trip home. (With a run by Starbucks, of course. Hey, I drive right by it!)

Since I've been doing the Bountiful Baskets thing, I've been trying to be a little more creative in what I do with it. And if not creative, at least productive. We don't always get to eat everything before it turns, but for the price, even if a few things go bad, I'm still coming out ahead cost-wise. And it really does get us to eat more fruits and veggies.

One thing that I thought was interesting when I first signed on is that you don't know what you're getting until you pick up your basket. Some people don't care for that -- the anal meal planners! -- but I think most of us think it's kind fun that way. I really enjoy getting there and seeing what I have to work with the following week. And frankly, we get some things that I'd probably never buy at the grosto, but actually enjoy using when I get them in my basket. So it really does inspire creativity in the kitchen!

If you've been following along on my blog so far, you've seen me mention items in my basket in probably every post. I've been posting the inventory and a photo each week on Facebook, but now that I've started this blog, I thought I'd do it here, as well. It is, after all, the reason for a lot of the recipes I come up with (for better or worse). So in case you've somehow missed my whole weekly basket routine -- now you'll know just what I'm talking about!

Now, on with it!

This week's stuff:


13 Brussels sprouts

12 potatoes

6 ears of fresh corn

1 head of leaf lettuce

1 bunch of celery

1 acorn squash

9 Fairchild tangerines

7 persimmons

7 Granny Smith apples

6 Concorde pears

6 bananas

1 bag of red seedless grapes