Friday, July 22, 2011

Green Chile Chicken Enchilada Casserole

I've been having a green chile craving lately, so I was trying to think of a good way to satisfy it.  I've never made a green chile chicken casserole before, mainly because Brian usually won't eat green chile.  But I thought I'd try making one and just trick him into trying it.  When the sauce is all mixed together, you can't really see the green chile, unless you're trying to figure out what's in it.  I just told him it was chicken casserole.  And, sure enough, he started eating it -- and loved it -- before he realized it had green chile in there.  Score one for me!

I use 505 Southwest brand green chile sauce (Albuquerque based).  This sauce has a creamy look and texture which I love, but there's no cream in it.  If you can't find that, then use your favorite jar green chile sauce.  (El Pinto is my second favorite brand and Kroger's / Fry's carries it).  Also, you'll want to use the amount of sauce to make it to your taste.  505 Southwest is a little bit hot -- although, I don't think it's at all bad (I can eat this stuff with a spoon, straight from the jar).  Brian is not a big heat fan, so I have to tone it down a bit for him.  However, I did use the whole jar in this and he thought it was perfect.

Also, I use the little mini tortillas that we buy straight from a tortilla factory here.  If you can't find those, you can certainly just use regular corn tortillas.  It won't change anything -- I just used the mini ones because I had them already thawed out in the fridge.

Finally, as I'm watching caloric intake somewhat, I made this with the Healthy Request/reduced fat soup, low fat sour cream, and skim milk.  I had regular Mexican cheese in the fridge, so I used that.  Next time I make this specifically, I'll buy the reduced fat version and give that a try.  If you're less concerned about calories, you can use the regular versions of the ingredients.

Finally, finally . . . I actually made this in advance, up to just before topping with the cheese, covered it with foil, and stuck it in the fridge.  When I got home from the gym, I put the cheese on and baked it while I was in the shower.  Came out great!  So, if you need something you can make and refrigerate, this works very well.

Okay, enough of that.  Here's the good stuff:


1 package of mini corn tortillas (about 18)
2 lbs chicken breast – cooked and cubed or shredded
1 jar of green chile sauce (505 Southwest is the best) OR green chile sauce to taste
2 cans cream of chicken soup (I used Campbell’s Healthy Request reduced-fat)
½  to ¾ C. low-fat sour cream
1 C. skim milk
2 C. cooked white rice
2 C. roasted corn kernels (I use frozen roasted corn kernels, but you can use regular)
1 to 2 C. chicken stock (to desired consistency)
Salt and pepper, to taste
1 t. cumin
8 oz. shredded Mexican cheese blend (reduced fat version, if you want to reduce fat and calories)
Black olives, sliced (optional)


Preheat oven to 375.

In a saucepan, mix together the green chile sauce, soup, sour cream, ½ cup of the chicken stock, salt, pepper, and cumin, and cook over medium heat until thoroughly mixed and heated through.  Add more chicken stock until the mix is the desired consistency.  You may want to make the sauce a little thinner than you think you want it, because the tortillas and rice will soak up some of the liquid.

Add the rice and corn and stir until well mixed into the sauce.  Remove from heat.

Spray a 9x13 baking dish with non-stick spray.

Add a small amount of sauce to the bottom of the dish.  Then layer tortillas, chicken, and ½ the remaining sauce..  Add a final layer of the tortillas on top, then pour the rest of the sauce over the tortillas, making sure each tortilla is covered with sauce (to prevent drying out while baking).  Top with the shredded cheese and black olives.

Bake about 30 minutes, until bubbly and heated through.

Tuesday, January 11, 2011

Bountiful Baskets - December 18, 2010 through January 8, 2011

Okay, I've been slacking off a little in getting my baskets posted on here.  Originally, I thought we were going to have two weeks off in a row, for Christmas and New Year.  They decided to offer the baskets in Arizona only, though, and my usual site decided to open for those days.

I really liked most of the basket contents for those weeks, too, so I'm glad I went ahead and ordered.  I've been making a lot of soup lately, so it was nice to have some vegetables for soups I love.  I've made two batches of Roasted Tomato Soup, which is posted below.  I've also made Roasted Cauliflower soup (posted further down) and Broccoli Soup.

Aside from using some of the veggies just as standard side dishes (sauteed green beans, yum!), I also made an amazing frittata using some of the onion, squash, tomatoes, jalapeno, avocado, and cilantro that I've gotten in both the conventional basket and the Mexican pack.  With it, I made an absolutely fantastic Roasted Tomatillo - Jalapeno Cream Sauce.  I had roasted the tomatillos and jalapenos from the first Mexican pack (they were offered 2 weeks in a row and I ordered them) -- I had intended to add them to the tomato soup, but it was just so good already that I just put the tomatilloes and jalapenos in the fridge.  I decided to try the cream sauce just to use them, and so glad I did!  I could put that on just about anything!  Thinking of making another batch with this last week's Mexican pack.

Potatoes are always welcome.  I made garlic mashed potatoes and Truffle Potato Chips with Parm-Regg -- homemade potato chips sprinkled with Pink Himalayan Salt and grated parm-regg, then drizzled and tossed with a little bit of white truffle oil.  Mmmm, mmmmm!

I also made pureed cauliflower -- a great stand-in for mashed potatoes on its own, or mixed half-and-half with regular mashed potatoes.  I love cauliflower anyway, but I love having it as a side "starch" that's practically guiltless.

As always, I'm trying to work more vegetables into my regular eating, both to be more healthful and to have less produce that goes bad before I get to it.  I know I should really probably pause for a week, but I've somehow convinced myself that if I do that, that week's basket will be the best ever and I'll have missed it.  So I keep ordering!

Another item I was SO glad to see in the extras was the sourdough bread.  It was offered one week a few months ago and I tried it.  It was the best bread I can ever remember having.  Ever.  And I'm not normally much of a bread eater, but this was just so awesome that we finished off the 5-loaf pack in less than two weeks.  Two people!  I was making a lot of sandwiches and garlic - parm bread.  So when I saw that it was offered again this last week, I ordered 3 packs!  Fifteen loaves for the two of us!  Fourteen of those are now taking up a chunk of my chest freezer, but I'm glad to have another stash.

Also worth a mention are the honeycrisp apples we got a couple of weeks ago.  I don't think I've ever tried them before, but I became addicted!  I don't eat a lot of apples -- see my laments on the supreme excess of apples and pears I STILL have.  But I'd heard such good raves about these particular apples that I had to try them.  Amazing!  My favorite snack now is honeycrisp slices with "caramel apple" dip.  I mixed light cream cheese with brown sugar and pure vanilla and the flavor is reminiscent of caramel apple when the apples are dipped in it.  I liked them so much that, when I ran out of the ones in my basket, I actually bought more at Trader Joe's!  Goofy to buy yet more produce when I already have so much, but I couldn't help myself.  De-LISH.

I'll try to get some of the recipes mentioned above posted on here this week, so check back later for those.

Now, without further ado, here are the basket contents for the last four weeks:


December 18, 2010


11 bananas
1 honeydew
1 bag of red grapes
1 3 lb bag of Fuji apples
1 pomegranate
10 Roma tomatoes
10 sweet potatoes
7 Yukon gold potatoes
4 Anaheim peppers
2 butternut squash
2 Mexican gray squash
1 head of Romaine

Add-on:  4 loaves of artisan rye bread ($10)


December 24, 2010


6 Roma tomatoes
3 cucumbers
1 head of Romaine
1 bunch of broccoli
1 head of cauliflower
1 yellow onion
1 head of garlic
1bunch of cilantro
9 Mandarin oranges
7 Braeburn apples
6 pears
2 Asian pears
6 bananas
1 pineapple


December 31, 2010


9 red potatoes
3 green bell peppers (gave those away)
2 heads of cauliflower
2 tomatoes
1 bunch of celery
1 bag of green beans
1 head of leaf lettuce
1 bunch of spinach
7 Honeycrisp apples
6 Minneola tangelos
5 pears
3 bananas
2 avocados
1 cantaloupe

Add-on:  Mexican Pack ($7.50)

10 tomatillos
4 yellow limes
4 avocados
3 jalapenos
3 green onions
2 yellow onions
2 Mexican gray squash
1 bunch of cilantro
1 head of garlic


January 8, 2011


10 Minneola tangelos
7 bananas
6 kiwis
5 Concorde pears
1 6 oz. container of blackberries
1 pineapple
14 Brussels sprouts
5 tomatoes
3 yellow squash
2 English cucumbers
2 bunches of celery
1 head of romaine


Add-on:  Mexican Pack ($7.50)

10 tomatillos
6 jalapenos
6 lemons
4 avocados
3 Mexican gray squash
2 yellow onions
2 bunches of green onions
1 bunch of cilantro

Add-on:  3x 5-packs of French country sourdough bread (15 loaves)  ($10/per pack = $30)

Friday, December 24, 2010

Soup(s) of the Day! (Roasted Tomato with Red Bell Pepper and Hatch Green Chile; and Roasted Mushroom and Garlic Soup)

The Why:

Yes, I am a soup addict.  Especially in the fall and winter -- nothing says comfort like a big cup of steaming soup.

I never really realized how easy it is to make homemade soup.  And once I decided to invest in an immersion blender, it became even easier.  Plus, if I make a big batch, I can put it in containers and freeze it -- most soups will freeze and reheat wonderfully.

Another technique I discovered is that roasting vegetables makes the best soups!  Now when I make any sort of vegetable soup, I pretty much always roast the vegetables first.

I picked up a few varieties of mushrooms at Lee Lee's  last weekend, intending on using them for something else (risotto, among others).  But I just started jonesing for soup, so the risotto will have to wait until I get back to Lee Lee's for more 'shrooms.  (For my soup, I used a combination of shitakes, creminis, and white button mushrooms.  You can use any combo of wild mushrooms you prefer or can find).

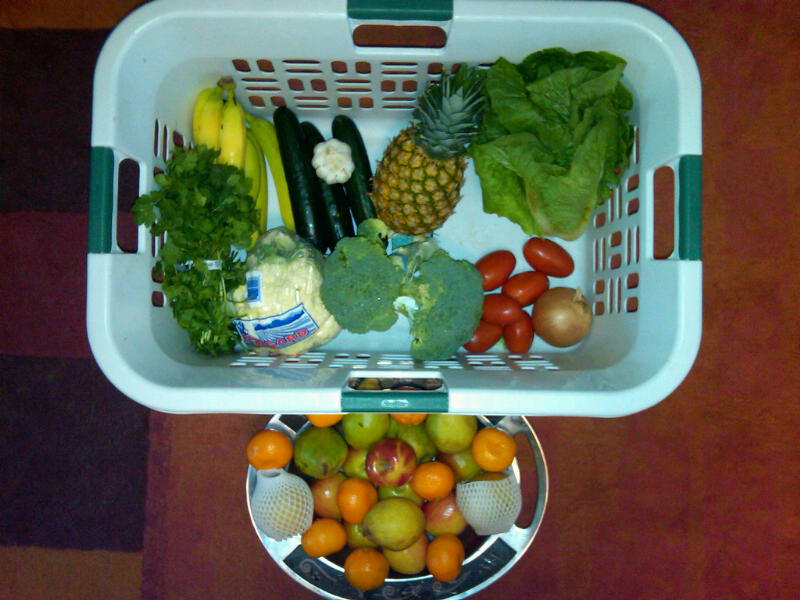
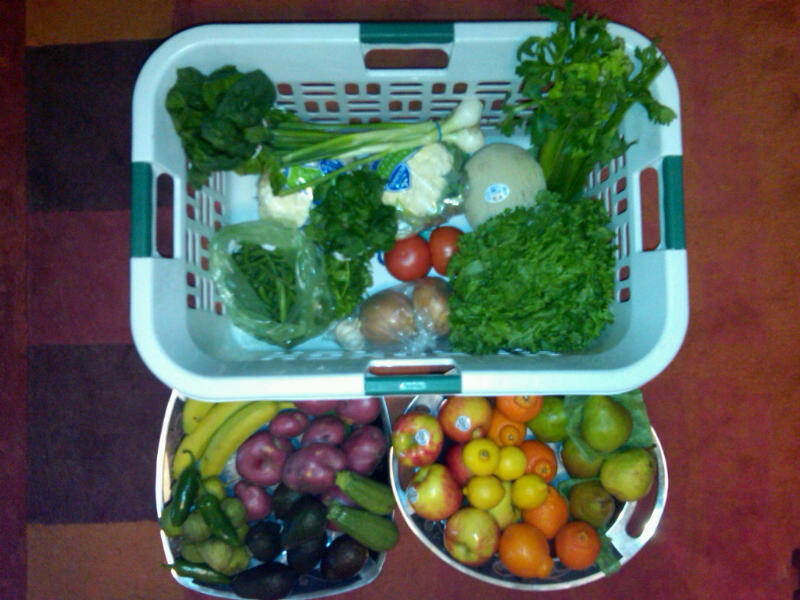
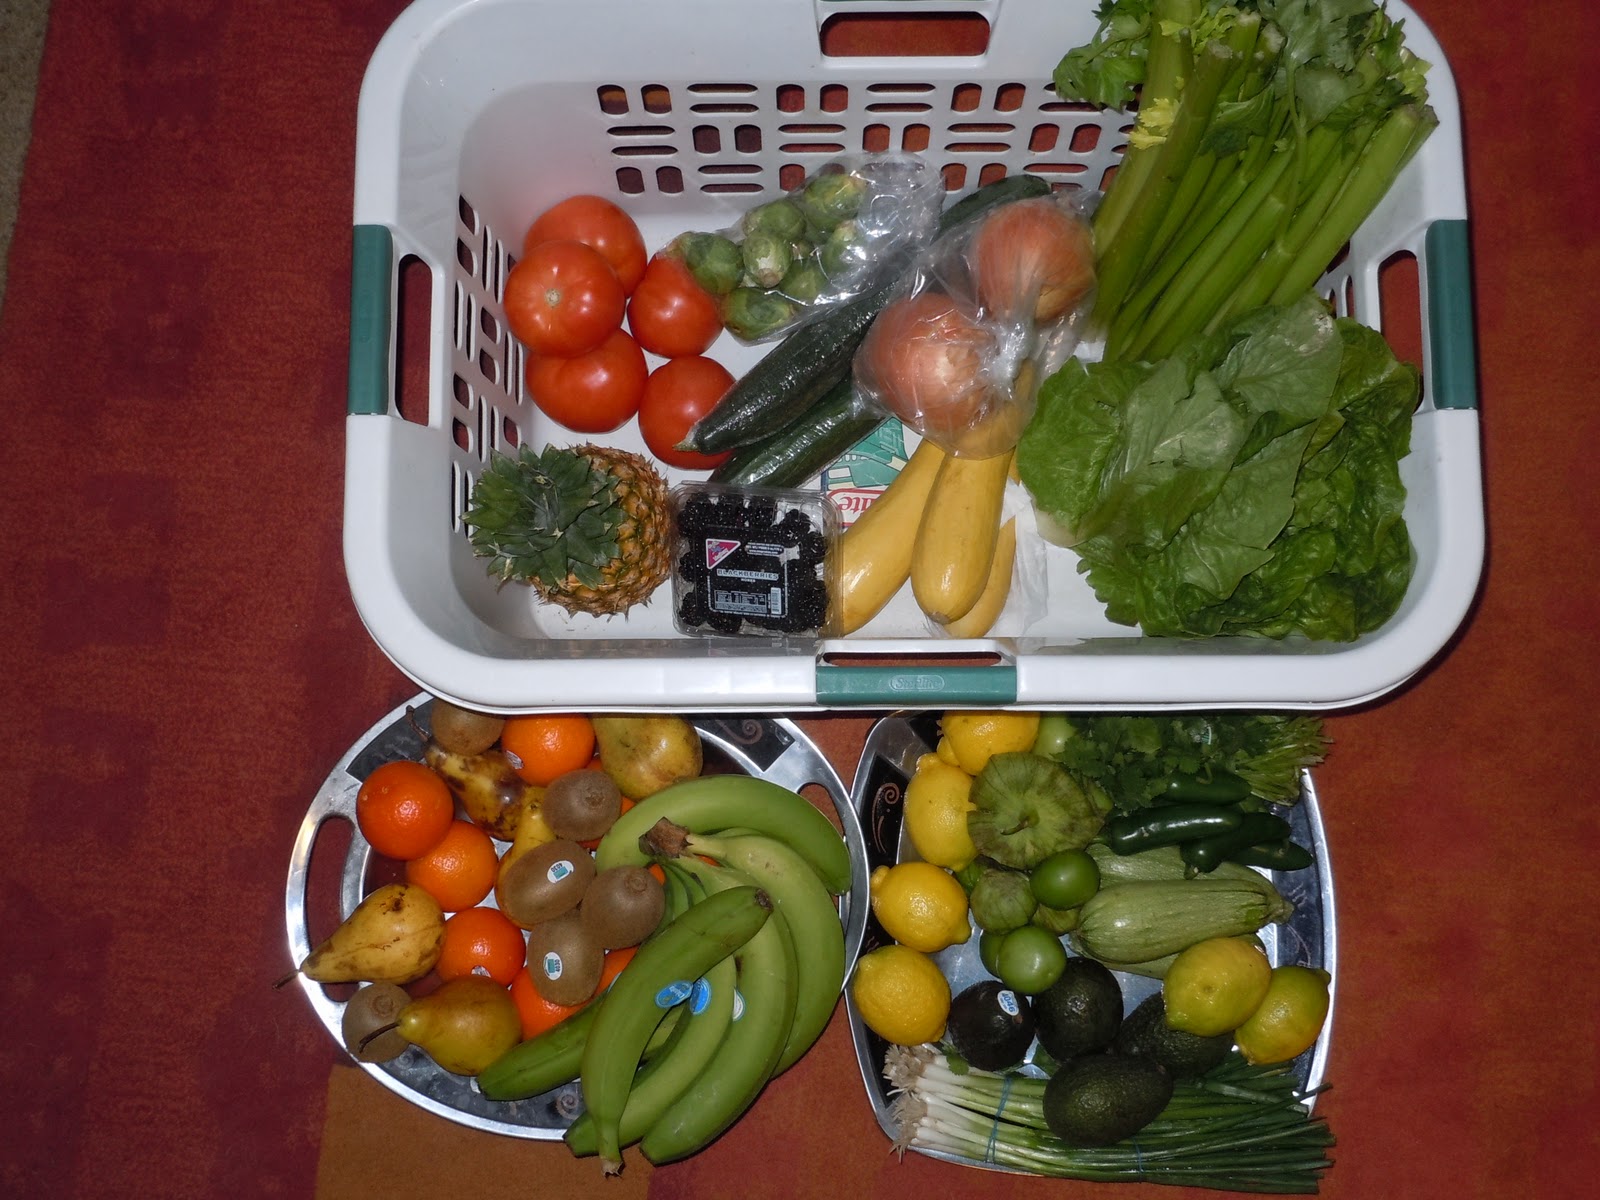
The thing was, I also had 10 Roma tomatoes from my Bountiful Basket that I needed to use.  Since I have my own tomato plants that are just starting to produce me a good crop, I didn't want to be lost under a pile of tomatoes.  And, I couldn't decide whether I wanted mushroom soup or tomato soup.  So, naturally, I made both!

Another little twist I did . . . I bought some canned Fire Roasted Hatch Green Chile from Trader Joe's the other day.  I was beyond excited to find roasted Hatch green chiles anywhere, even if they were canned.  I've had the regular green chiles in the can that you find in most grostos, and they always taste rather flavorless to me.  But these Hatch chiles are quite good!  Most canned and packaged goods that TJs sells are way better quality than what I've had before.  They really are awesome at preserving freshness as much as possible, and I can certainly taste the difference.

I bought several cans of the Hatch chiles, and tomatoes and chiles are just a match made in culinary heaven.  So I threw the contents of one of those small cans into the tomatoes, red bells, shallots, and garlic I was pureeing and whipped them up.  Amazing results!  There's just a hint of the roasted chile flavor, and a tiny kick of spice, and it works beyond beautifully with the roasted tomatoes and bells.  I'm not sure I'd love it quite as much with the other canned chiles, but it certainly won't hurt it to try.  My second choice, though, if I didn't have the Hatch chiles, would be to buy some Anaheims or similar fresh chiles and roast and peel myself.  They're not Hatch, but at least they'd be fresh!

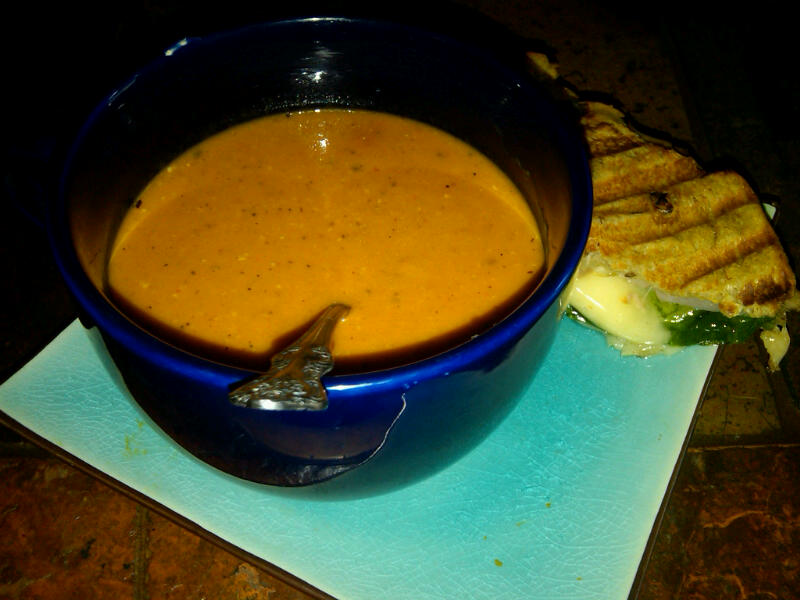
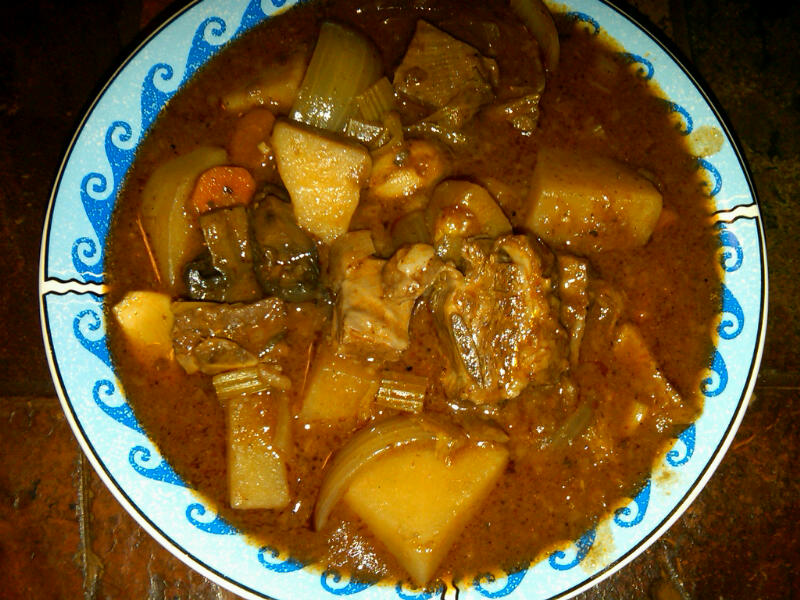
This is absolutely, by far, the best tomato soup I have ever had!

As I said . . . couldn't be easier!  Cutting up some veggies and aromatics, tossing with EVOO, and roasting for a bit -- then puree, add more stuff, cook.  Done. In about an hour or so, start to finish, you can have a steaming pot of soup.  Just don't forget the grilled cheese!

The How:


Roasted Tomato Soup with Red Bell Pepper and Fire Roasted Hatch Green Chile

10 medium Roma tomatoes, halved and cored, if needed
2 medium red bell peppers, quartered
2 medium shallots, peeled and quartered
3 to 4 garlic cloves, peeled
2 T. EVOO
1 small can of fire roasted Hatch green chiles or ½ C. of roasted, peeled, and chopped Anaheim green chiles
2.5 to 3 C. chicken broth or stock
Salt
Fresh ground pepper
1 t. Italian season blend
¼ C. heavy cream (optional)

Heat oven to 425 degrees.  Arrange tomatoes, cut side down, and green chiles (if using) in a single layer on a foil lined baking sheet.  Drizzle with EVOO.  Wrap garlic cloves, drizzled with EVOO, loosely in another piece of foil.  (You can roast a whole head of garlic if you prefer – just cut off the top, drizzle with EVOO, and place on the baking sheet, either wrapped or unwrapped).  Roast for 10 minutes, then add the shallots, tossed with EVOO, to the pan and continue roasting for about 30 minutes more, until the skin on the tomatoes start to shrivel and blacken.

When the tomatoes and bells are cool enough to handle, peel the skin and place in a saucepan.  Add the roasted garlic and shallots.  If using fresh roasted green chiles, place them in a plastic bag as soon as they come out of the oven.  Seal the bag and let the chiles steam for about 20 minutes, then peel and seed.  Add chiles to the pan with the tomatoes.

Using an immersion blender, puree the tomato / vegetable mixture with 1 cup of the chicken broth, until smooth.  (Alternatively, you can blend in a stand blender – work in batches, if necessary).

Add 1.5 cups of the remaining broth to the puree.  Add the Italian seasoning blend, and salt and fresh ground pepper to taste.  Bring just to a boil, reduce heat to medium-low and simmer for 20 minutes, stirring occasionally.  (If you're really in a hurry, you can skip the 20-minute step, but I like to cook for a bit when using dry herbs, to make sure their flavor gets infused.)  Add the cream, if using, and stir to incorporate.  Heat for another 1 to 2 minutes, until heated through again.

Ladle into bowls and serve with – what else??!!  Grilled cheese!

 *****************************************************************

 
Roasted Mushroom and Garlic Soup

1.5 lb of assorted mushrooms (cremini, shitake, white button)
2 shallots, peeled and quartered
6 to 8 garlic cloves (or many, many more – if you’re like me)
2 T. EVOO
3.5 C. beef broth (divided:  1 C. and 2.5 C.)
3 T. butter
3 T. flour
¼ C. dry red wine
2 to 3 t. herbs de Provence
Salt
Fresh ground pepper
½ to 1 C. heavy cream
Dash of fresh grated nutmeg

Heat oven to 400 degrees.

Clean the mushrooms and trim the stems, if necessary, to get any hard ends off.  Quarter or thickly slice and place in a bowl.  Add shallots and garlic cloves to the bowl.  Drizzle with EVOO and toss to coat.  Place the vegetables in a single layer on a foil lined baking sheet.

Roast until the mushroom are tender, about 30 minutes.  Set aside about ½ cup of the roasted mushrooms.

Place the remaining mushrooms, shallots, and garlic in a bowl, along with 1 cup of the beef broth.  Using an immersion blender, puree the mushrooms until they’re your desired texture.

In a medium saucepan, melt the butter over medium heat.  Add the flour, stirring constantly, until you create a smooth roux.  Continue to stir constantly for another 2 minutes, until the roux just starts to darken to a light tan.  Slowly pour in 1 cup of the beef broth, stirring constantly with a whisk.  Continue to whisk until all lumps are gone.  Cook for about 5 minutes, until the broth starts to thicken.

Add the red wine and stir to incorporate.  Add the mushroom puree and stir thoroughly.  Add the remaining beef broth, until the mixture reaches your desired consistency (you may or may not use all of the broth, depending on how thick you want your soup).

Slice or chop the reserved 1/2 cup of mushrooms, and add to the soup.

Add the herbs de Provence, and salt and freshly ground pepper to taste.  Bring just to a boil, then reduce heat to medium-low and cook for 20 minutes, stirring occasionally.  Add the cream to your taste, if using, and a dash of fresh grated nutmeg.  Stir to incorporate and cook for 1 to 2 minutes more, until soup is heated through.

Ladle into bowls and serve with garlic-parmesan bread or your favorite grilled cheese sandwich.


Saturday, December 18, 2010

Blender Hollandaise

The Why:

There are a few things that I love to eat, but don't often have the patience to actually fix.  One of these things is Eggs Benedict.  And the sole reason I rarely make this at home is the hollandaise.  I've never found it that difficult to make, it just takes more time and patience than I usually have at that moment.  Probably because I'm always ravenous when I decide I want it.

A little while back, I heard the term "blender hollandaise."  At first, I was offended because I thought there was just no way to make a decent hollandaise without all the work.  But the other night, I was ravenous (again), and the 'fridge full of leftovers just weren't appealing to me.  I wanted eggs.  Plus, I had some of the very thin-sliced ribeye from Lee Lee's that I'd bought for pho.  It was almost 2 pounds, though, so I figure I could spare a few ounces for some steak 'n eggs benedict.  There was just my mental block against the sauce thing.

I remembered the blender hollandaise, and decided I'd just give it a shot.  I was very pleasantly surprised, too!  The sauce took, literally, about 2 minutes to make and it was actually quite good -- smooth, rich, creamy . . . just as a hollandaise should be.  I may never make it the "real" way again.

A couple of notes:

Some people have an aversion, if not down-right phobia, of being in the vicinity of raw or undercooked eggs.  I've never been one to worry about that much -- even eating a raw egg on top of my Crepe Complet in Paris (the one in France, not the one in Tennessee) on more than one occasion.  The actual risk of salmonella is so small that I just don't even usually think about it.  Plus, the eggs in this sauce aren't exactly raw.  They're mixed with melted butter that should be very hot, which raises the temperature of the eggs.  Also, the addition of lemon juice as the acidic component helps "cook" the eggs in the sense of killing off harmful bacteria that may be present.

You'll have to judge for yourself if you want to try this recipe.  I know people who won't eat hollandaise at all, ever, because of the fear of food poisoning.  I just wouldn't want to miss the deliciousness out of fear.  But, hey, I've eaten raw sushi at least 200 times and I've never, ever been sick from it (knock on wood).  Nor has hollandaise ever gotten me down.

I would recommend, though, that you use the freshest eggs you can find -- don't use the ones that are 2 weeks past their recommended "use by" date.  I say this, in truth, less out of bacterial fear than out of a desire to have the best-tasting eggs possible in my sauce.  Eggs are the huge component, so if their flavor isn't stellar, you'll know it.

As I said above, the butter should be melted, and very hot.  The heat helps "cook" the eggs.  And when you're adding the butter to the blender, make sure you do it in a thin, steady stream.  Don't just dump the whole thing of butter in there, or your eggs may curdle.

Finally, my recipe uses a little Dijon mustard in it, because I'm a huge Dijon fan.  If you're not, you can eliminate it or substitute something else.  If you find your sauce is too thick, add another teaspoon of lemon juice -- or even if you just really like lemon.  The same goes for the hot sauce, as well -- but trust me, the small amount of hot sauce you'll add will not make you sweat or even need another sip of your bloody Mary.  I think it just adds another, subtle level of flavor.  But, again, you have to eat it, so adjust it to your liking.

(The photo is Steak and Eggs Benedict with Blender Hollandaise and I used cheese grit-cakes instead of the traditional English muffin).

Now, on to the good stuff!

The How:


Blender Hollandaise

3 egg yolks
¼ t. Dijon mustard
1 T. lemon juice
1 dash hot pepper sauce (e.g. Tabasco)
½ C. butter

In the container of a blender, combine the egg yolks, mustard, lemon juice and hot pepper sauce. Cover, and blend for about 20 to 30 seconds.

Place the butter in a microwave-safe measuring cup (or some other cup with a pouring spout). Heat the butter in the microwave for about 1 to 1.5 minutes, or until completely melted and hot.

Set the blender on high speed, and pour the butter into the egg yolk mixture in a thin, steady stream. It should thicken almost immediately. Keep the sauce warm until serving by placing the blender container in a pan of hot tap water.

Wednesday, December 15, 2010

Lamb Stew in the Crockpot

The Why:

I've owned at least one crockpot for nearly all of my adult life.  This was one of those household items my Mom gave me way back when, because she had 3 or 4 and used them a lot.  And what could be more convenient for someone who works all day, then has to come home and deal with dinner?  Such an awesome kitchen invention!  Pile all your fixins in the pot in the morning, set it on low, come home to delicious aromas and a supper that's ready for you to sit down and eat.

And crockpots have come a little ways, too.  The old school ones were usually just two settings, high and low.  This was usually enough, but I admit I enjoy a couple other conveniences.  My current crockpot has three settings -- the ubiquitous high and low, and also a "warm" setting to keep the contents just at warm without cooking further (much, anyway).

Also, the big thing for me -- I can set how long I want the pot to cook, in 30 minute increments.  Whether I set it on high or low, I can program in the time and at the end of it, the pot automatically switches to the "warm" setting.  This has been especially handy, but this crockpot seems much more efficient that what I've had before -- it tends to cook much faster than I'm used to.  After using it a few times, I can fairly well judge how long I need to program the time.

It's been a while since I've actually used a crockpot on a regular basis.  I used to cook in it at least once or twice a week, especially in the cooler months.  Now, I use it maybe once a month or so, usually when I get a hankering for something "old school."

So, as I was shopping in Lee Lee's Oriental Supermarket the other day, I was loving the different meat selections that I usually don't see in the regular grostos.  Their fish market is the best I've seen locally, and their meat market is pretty extensive, too.  Some of the offerings are more ethnic than I'd ever attempt at home (chicken feet, pig liver, and other parts I'm not even sure exactly what they're used for).  But some meats, while they have their places in Asian cooking, are also very adaptable to our less-adventurous American fare.

The other day, I happened to see two things that really sounded good to me.  One was sliced rib-eye steak -- and we're talking super-paper thin slices.  This is typically used in dishes such as Vietnamese pho and Japanese shabu-shabu.  (Both of which I want to try at home).  But, I was thinking this would also work great for simple Philly cheesesteak sandwiches.  The meat is so thin it'll cook in, literally, a minute.  And I was thinking this might be something B. would eat, even though he usually prefers filet or sirloin over rib-eye (he hates the marbling, which I love).  So that's an upcoming meal this week.  (They also had super thin pork loin slices, which I may check out in a future trip).

Lee Lee's also had cubed meat -- beef, goat, and lamb.  I love lamb, so I thought I'd pick up a pack and do a crockpot stew.  (I may try the goat, too, though).  I was thinking I'd do a more traditional stew, rather than something more "exotic" like Mulligatawny.  But this is me, after all, so even my traditional tends to get a little crazy at times.

There's nothing really strange in here, by any means, but the gravy is from scratch rather than throwing in a packet of dry beef stew mix or dry gravy mix.  One little tweak that I did, which I've never seen before, is to add a bit of hot mustard paste.  I picked this up in the tube on Saturday, because I love hot mustard in Asian restaurants.  And for some reason, it just seemed like it would work well in my stew it did).  There's not so much in there that you get a pungent mustardy flavor, but there is just enough to get a subtle undertone of it.  Otherwise, my flavorings and spices are pretty "normal" stew fixins -- but like any stew, it's highly customizable.  Be creative!

I loved the way mine turned out, especially as I had the bright idea to serve it over cheese grits.  Most of the time, stew just goes with good crusty bread, but I've been in the mood for cheese grits lately, so I went with it.  I always cook my grits using a combination of chicken broth and skim milk, rather than just plain water.  This time, at the end, I also added some grated Manchego and some Blue Castello to melt right it.  The result was amazing -- rich, creamy, and satisfying -- everything grits should be!  And with the stew on top, this dish just went to a whole other level.  Can you tell I'm a huge fan?

A couple of notes:

As I said, stew is a highly customizable dish by its very nature, especially the vegetables.  I used the standards:  potatoes, onions, garlic, celery, carrots.  That's what I had on hand.  But you could certainly use turnips, parsnips, rhutabaga, or just about any root vegetable.  I'm also a big rosemary lover, so I used a good amount.  If you prefer thyme, use more of that.  There's no real rule -- except to just like what you put in.

Also, as I mentioned, my crockpot tends to cook much faster than I'm used to.  In the directions, I give a time range for the cooking part -- but know that these times are purely estimates!  I have no idea how fast or slow your pot will cook.  As a sort of guide for your comparison:  I turned my pot on high for the first 1.5 hours, then I switched it to low for another 3 hours.  (I was leaving for the gym and didn't want to overcook, so I switched it to low).  I think those times cooked it perfectly for me -- luckily, since I was totally guessing and I wasn't here to check on it.  Plus, I have a good sized pot, and it was full!  If there's less in the pot, it will cook faster.   So play with your times and, if possible, keep an eye on it the first time you make it so you can get an idea of the right time for you.

Now, on to the good stuff!

The How:
 
Lamb Stew in the Crockpot

1.5 to 2 lbs boneless lamb, cubed
¼ C. of flour
1 t. salt
½ t. pepper
3 C. beef broth
1.5 C. red wine (a good wine that you’d actually enjoy drinking)
1 6 oz. can of tomato paste (good quality)
1 T. hot mustard paste
3 T. Worcestershire sauce
4 springs fresh rosemary (about 6 inches each), either left whole on the stalk or finely chopped
1 T. dried Herbs de Provence
1 t. paprika
1 large or 2 small bay leaves
1 medium onion, chopped
1. 5 lb potatoes, cut into chunks
Several cloves of garlic (to taste) – I used some whole, some rough chopped
2 stalks of celery, chopped
1 C. carrots, sliced
1 8 oz. package of mushrooms, sliced into halves
Salt and fresh ground pepper, to taste

If using stew meat, trim the excess fat.  Combine the flour, salt and black pepper in a plastic zipper bag (or large bowl).  Dredge the meat in the flour mixture (in batches if necessary). Shake off any excess flour.

Heat 1 T. of olive oil in a large skillet over medium-high heat.  When the oil is hot, place chunks of meat in the skillet and brown on all sides.  Don’t crowd the meat.  Put the browned pieces into the crockpot as you finish them.

Add the beef stock and red wine.  Add the Herbs de Provence, the paprika, the rosemary, the bay leaf, the tomato paste, the hot mustard, and the Worcestershire sauce.  Stir gently just to distribute.  (The mustard and tomato paste will dissolve as the pot heats up).

Add the onion, potatoes, garlic, celery, carrots, and mushrooms.  Add salt and fresh ground pepper, to taste.

Cook on high for 3 to 4 hours, or on low for 6 to 8 hours, until meat is fork-tender and gravy is well-thickened.  (Note:  Cook times will vary based on your particular crockpot).

Remove the bay leaf and the rosemary stalks, if you used it whole.  Serve over rice, pasta or grits, or with fresh, crusty bread.

Tuesday, December 14, 2010

Bountiful Basket - December 11, 2010

I was happier with this week's basket, compared to last week's -- but still MORE pears and applies!  I did have an appointment yesterday with my pain management staff and we were chatting about holiday treats, so I promised I'd make them one of the pear-hazelnut frangipane tarts after the holidays (they were swimming in sweet treats already).  If I get very industrious, I should just make a bunch of fruit-oriented desserts to give away.  No doubt they'd go over well at B's work, too.

I was pleased to see an eggplant this week, which we haven't had in a while.  We got more yellow squash, which is a pretty easy one to work with.  And another new one -- Kabocha squash.  I can't remember having this one before, but a quick google search indicates that it's a Japanese cousin to our pumpkin.  My favorite way to do just about any squash is roasting (except for zucchini, which I love grilled).  So, I'm thinking the Kabocha is destined for the oven, and maybe eventually paired with something else for a blended soup.  When we finally get some good soup weather here, anyway!

Speaking of grilling, that's one of my favorite ways to do eggplant, as well.  I was thinking of doing a grilled vegetable plate, using the eggplant, squash, some sweet potato (another bunch this week, so I'm swimming in those, too), and some red onion, with a basil-cucumber-garlic dressing.  Maybe with a little blue cheese for just a bit of tang and creaminess.  I haven't put this all together in a final version yet, but I'll post the pic and The How when (if) i get to do it.

I did get inspired to use some of those same vegetables in a curry this weekend.  One of my favorite stores is Lee Lee's Oriental Supermarket.  Lee Lee's is amazing -- it's like taking a mini Asian/Middle Eastern tour all under one roof.  And the sheer size -- it's bigger than the Fry's I usually go to when I go to a big chain.  At Lee Lee's, the shelved products are organized by country/region.  There are aisles devoted to Japan, China, India, the Philippines, the Middle East, Korea, Thailand, Viet Nam, and many more.  Just about every Asian country is represented.  It's mind boggling.

So much so, in fact, that I spent nearly FIVE HOURS shopping in there on Saturday.  (And another 2.5 hours on Monday!)  I love going aisle-by-aisle and perusing all of the offerings, many of which I've never seen.  There's just so much to see that I could never address it all in one blog post, so I won't even try.  But just about anything you can think of in the Asian world of food, they've got it.

Plus, every time I go in there, I'm in the little minority as a white girl.  Although recently, I have noticed quite a few more caucasians shopping in there.  I guess the word is out!  It was fun for me being one of the tallest people in the store, though.  ; )

Anyway, back to my original subject -- after my trip to Lee Lee's, I was set to try making something curry.  I got a variety of curry pastes to try -- I haven't yet been ambitious enough to try making my own curry bases, but I did find a link to Jamie Oliver's site, where he gives recipes for five basic curries.  I've bookmarked it to try.

But, as I've never really made an actual curry before, I decided to just try the bases.  And because I had all of these curry-friendly vegetables, I decided to make a vegetable korma curry.  My favorite Indian restaurant across the way has a wonder korma curry, and I thought I'd give it a shot.  It's actually quite easy when you start with a paste.  I didn't take a pic of my final outcome and I didn't write down an actual recipe, but if you've ever been intimidated by trying a curry at home, don't be!

I just cut up the following into manageable eating pieces:  sweet potato, Yukon gold potato, eggplant, yellow squash, onion and garlic.  I started off by sauteing the onion and garlic in a saucepan until the onions were soft.  Then I added the korma paste and fried for a minute or two.  Note:  Most curry spices and pastes need to be fried before you put them in the curry, in order to release the flavors.  Normally, you are told to not fry dry spices because they could burn and taste funky, but the opposite is true for curry spices.  So, fry them for a bit, just don't do it over high heat, and stir frequently to keep from burning.

Another product I've stocked up on from Lee Lee's is coconut milk.  I love coconut milk-based curries, and the korma is one.  So after the curry paste cooked for a bit, I added a can of coconut milk.  Then I added the vegetables and let them simmer, covered, on low heat for about half an hour, stirring occasionally, until the vegetables were the texture I prefer (soft, but not mushy).

And because I just can never do anything the standard way, I decided to play with the flavor a bit.  I fried about 1/2 of a small can of masaman curry (a Thai curry), then added that to the korma and vegetables and cooked.  I was really pleased with the outcome!  I hope India and Thailand will forgive me for blending their cuisines.

As I said, I bought several different curry bases, so I'll have fun playing around with them.  When I get a little more curry-making experience under my belt, I'll post the recipes.  But if you like curry, don't be afraid to try it at home using a curry paste -- couldn't be easier!

I have to say, my Bountiful Basket is inspiring me to cook a lot more at home, and to be creative in the kitchen.  And Lee Lee's is inspiring me to attempt some different cuisines that I'd never thought about trying at home.  (Up soon -- Vietnamese pho!)  So, now you know what I do for fun!

Now, on to the good stuff:

This week's Bountiful Basket:

8 sweet potatoes
2 yellow squash
1 Kabocha squash
1 pint of grape tomatoes
1 head of romaine lettuce
1 eggplant
1 head of garlic
1 bunch of green onions
9 bananas
8 Fuji apples
5 navel oranges
5 pears
2 Oro Blanco (white) grapefruit
1 pineapple

Friday, December 10, 2010

Pear - Hazelnut Frangipane Tart

The Why:

We've had pears in our Bountiful Basket every week for the last several weeks.  That's a LOT of pears, considering we usually get at least half a dozen a week.  I haven't been able to use all of them before they turn, which I hate. 

So, since I've been in such a baking mood lately, I decided to make a pear tart.  I originally planned to make this for Thanksgiving, but I ended up doing the lemon cake instead.  I was thinking about the tart earlier this week, and trying to remember to get some blanched almonds at the grosto. 

Frangipane is traditionally made from almonds, but hazelnut frangipane has become popular, as well.  As I was going through my pantry looking for something else, I found a bag of hazelnuts I'd forgotten about (story of my life).  The only thing I had missing for my tart ingredients were the nuts, so I decided to do the tart with hazelnuts instead of almonds.

Typically when I make a recipe, I do a little research online first, just to get the basics of what I want to do.  I can never follow another recipe without doing my own thing with it -- and such is the case here.  I discovered there were only about 3 or 4 versions of this tart recipe -- lots and lots of links, but the recipes turned out to be the same as I'd already seen.  So, basics in hand, I set out to do my own.

Traditionally, the pears aren't poached before being added to the tart, it appears.  But I was thinking that lightly poaching them first would just add a whole new depth of flavor.  And the spices I used in the poaching liquid are ones I associate with "the holidays."  And the poaching liquid smells so good!  White wine, cinnamon, ginger, orange peel -- yummy holiday scents!

I only lightly poached the pears because they still cook a while longer in the over.  I'm sure poaching makes them harder to deal with for placement on the tart, but as always, I tend to go more for flavor than aesthetics.  You can forgo the poaching first, of course, but I recommend it highly to get the extra level of flavor.  And yours may turn out perfectly!  I'd never made a pear tart before, so I may get better in the aesthetics department with a little practice.  Mine wasn't ugly, by any means, but I just didn't get it as perfect as I wanted.  It's very rustic!

Another little twist I did was to put a thin layer of Nutella on the bottom of the crust under the frangipane.  (I did this while the crust was still pretty warm, so the Nutella spread easily without damaging the crust.)  The frangipane is hazelnut, so I thought the Nutella would be great -- chocolately - hazelnutty goodness!  I was right!  I love it!  Again, this step is optional, but I think it's awesome.  Alternatively, you could use a thin layer of your favorite jam -- blackberry, raspberry, etc.  I thought about using blackberry jam that I have in the pantry, but went with the Nutella instead.  You could also just do it the traditional way, with no extra layer.

Other recipes I looked at all seemed to have a "glaze" of apricot preserves over the pears.  Some were done before cooking, some after.  I didn't do this because I had poached my pears first, and I wanted that flavor to come through.  If you decide not to poach the pears first, I'd recommend using the glaze.  I'd think you could use any flavor of jam or preserves -- apricot is probably standard because it wouldn't change the coloring of the pears.  I'd mix apricot preserves with a bit of lemon juice and microwave to melt the glaze for easier spreading over the pears.  I may try this next time, even with the poached pears, just to compare.

Finally, I would only use fresh pears for this!  I saw some recipes using canned pears, which I guess is okay if you just have to make the tart and you just can't get fresh pears.  Personally, I'd just make something else rather than using canned pears in this.

Now, on to the good stuff!

The How:


Pear – Hazelnut Frangipane Tart

1 C. hazelnuts -- toasted, loose skins rubbed off in a kitchen towel, and cooled
½ C. sugar (divided into ¼ cups)
¼ C. all-purpose flour
6 T. cold unsalted butter, softened
2 large eggs
1 t. pure vanilla extract
½ t. pure almond extract
¼ to 1/3 C. Nutella
3 firm-ripe pears, poached (see below for instructions)
Tart shell or frozen pie crust, thawed and pre-baked according to package directions

Preheat oven to 350 degrees.

Pulse hazelnuts with ¼ cup sugar in a food processor until finely ground, then add flour and pulse to combine.  (Don’t overprocess).

Beat together butter and remaining ¼ cup sugar with an electric mixer at moderately high speed until pale and fluffy. Add eggs 1 at a time, beating well after each addition, then beat in extracts. Reduce speed to low and mix in nut mixture until just combined.

Spread a thin layer of Nutella on the bottom of the crust while the crust is still warm.  Spread frangipane filling evenly over it.

Cut the poached pears lengthwise into ¼ inch-thick slices, cutting to just below the stem end to keep the slices together. Arrange pears decoratively on filling, fanning slices slightly.

Bake until pears are lightly golden and frangipane is puffed and golden brown, 30 to 40 minutes.


Poached Pears

1.5 C. white wine
3 C. water (enough to cover pears)
½ C. sugar

2 to 3 long strips of fresh orange peel
1 T. fresh ginger, sliced
1 cinnamon stick
½ t. pure vanilla extract
2 T. orange liqueur (e.g. Grand Mariner)
3 firm pears; peeled, cored, and halved (Bosc or Concorde)

In a large saucepan, combine all ingredients except the pears.  Bring to a boil and cook until the sugar is dissolved.  Reduce heat to a simmer.

Slide in the pears, making sure they are covered with liquid.

Keep the liquid at a simmer and poach lightly, about 15 minutes.

Remove from heat and let the pears cool in their liquid.